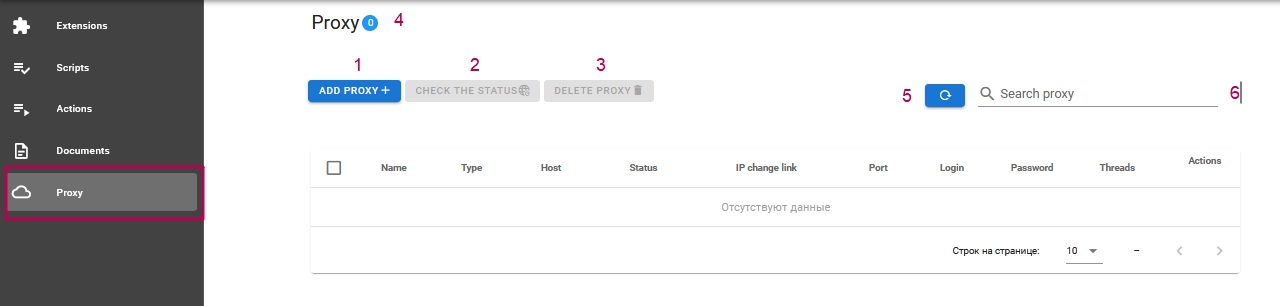
1. When you go to the section Proxy you can add, check, remove proxy.
1 – Add proxy button
2 – “Check proxy” button
3 – “Remove proxy” button
4 – Proxy number indicator
5 – Button “Update list of proxies”
6 – Proxy Search
2. At the click of a button “Adding a proxy” you can add proxy by auto parsing proxy string or add manually
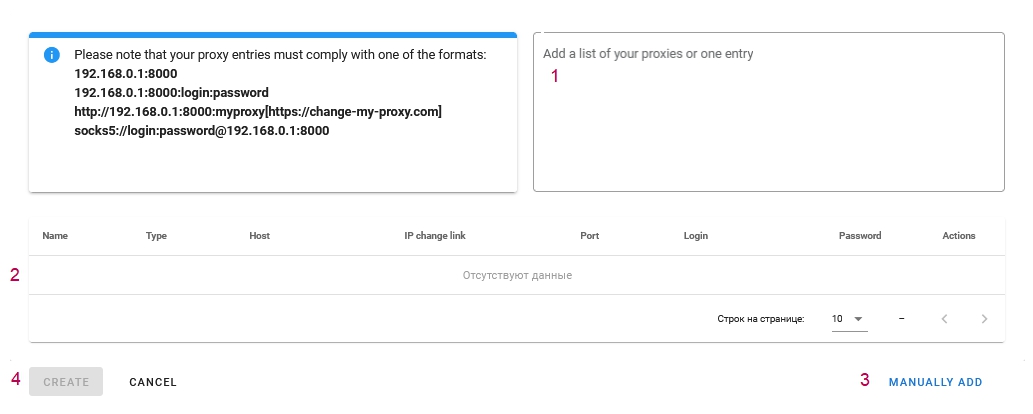
1 – The field for specifying proxies as a list for auto parsing
2 – List of added proxies
3 – “Manually add proxy” button
4 – Button “Save proxies”
Example of adding a proxy:

3. After adding a proxy, you can check its performance and set the number of threads for each proxy
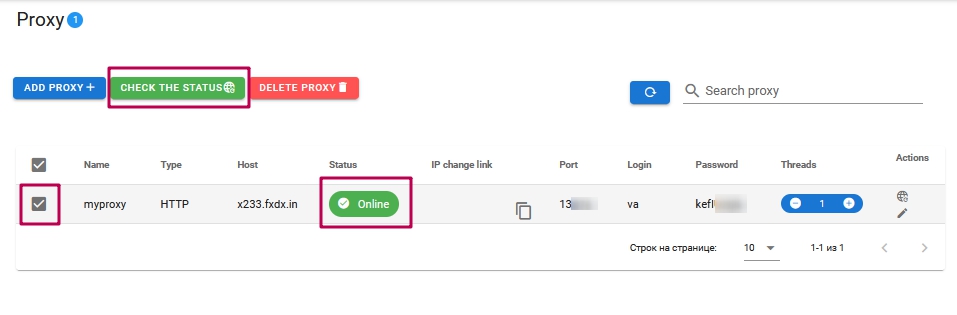
The number of proxy threads is an indicator of how many accounts will work on this proxy. If put 2 flow, then, regardless of the total number of extension work threads, only 2 extensions at the same time, the rest will be in line.
4. After adding proxies to the “Proxy” block, you can set proxies in one extension, multiple extensions or a group.
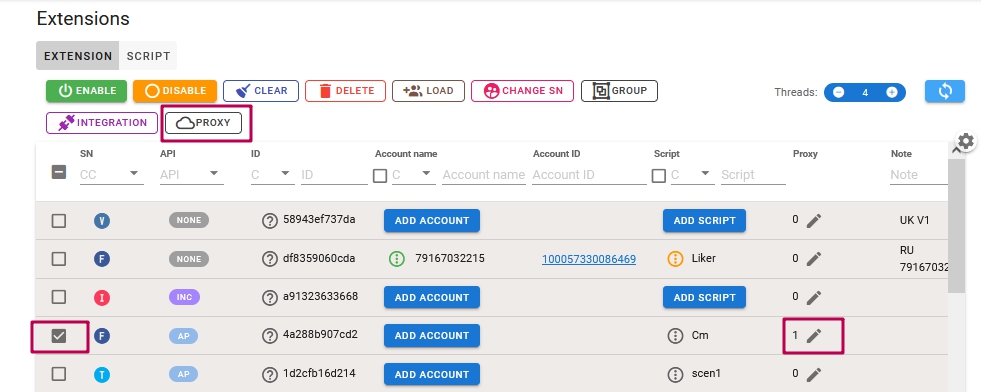
Choose a profile and set a proxy using the top menu or in the “Proxy” column.
For example, you can select multiple profiles in your account and click proxy in the top menu and select multiple proxies at once. Then, depending on the availability of proxies, the required proxy will be installed in these profiles. And even if you have proxies configured in several threads, then Scenum itself will regulate in which profiles which proxy will be installed.

IMPORTANT! All Scenum cabinet profiles must be API integrated with antidetect profiles (Dolphin, AdsPower или Undetectable)*
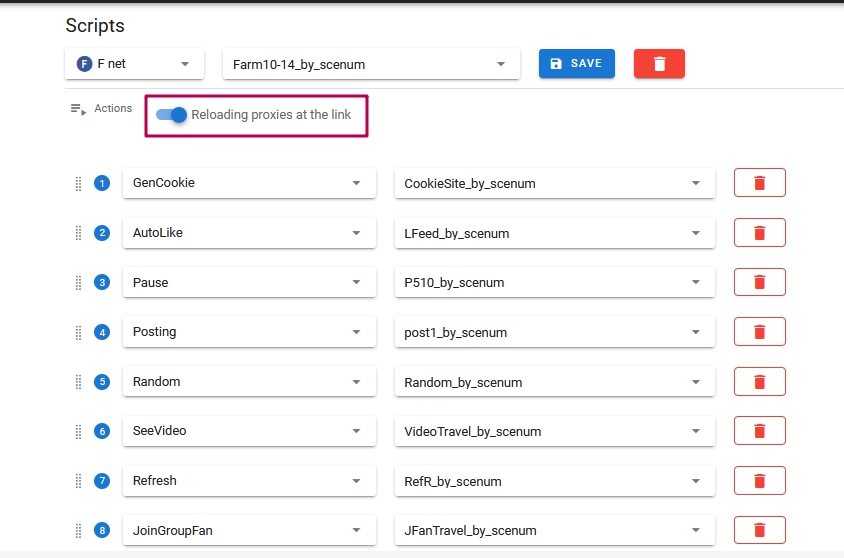
5. After installing proxies (when, if the proxy entry contains a link to reboot) in profiles you can reboot proxies before the script automatically. You only need to turn on the proxy reboot switch in the script settings.
*At the moment block proxy is only available in Dolphin, AdsPower and Undetectable Browsers.
To work most effectively with the proxy block, read our article Never before have proxies been used so effectively!
Recent Comments