The service consists of two parts:
– user's personal account
– extension (it needs to be installed in the browser).
The easiest way to set up the system is with our new video manual – https://youtu.be/qhOIdDvLz2M
Authorization in your personal account.
Register on the official website scenum.io and get a trial period.

After registering with the service, you will receive an email 2 letters.

The first email will contain a link to activate your account., and in the second – personal account link, login details for your personal account(login and password), and link to generate extension. Don't forget to verify your account using the link in the first email, or contact Customer Support to activate your account.
Follow the link and you will see this notification.

To get started, you need to enter your personal account with the login data specified in the registration letter.
Upon successful login, you will see your personal account
After confirming the mail, open the link to your personal account and enter it using the login and password from the 2nd letter.
Be sure to check out Privacy Policy, Terms of Use and Offer before clicking the Accept button.

After these steps, your personal Scenum account is ready for further work. This is what it will look like in the beginning.
Initially, there are no accounts in it. Let's move on to the step of adding accounts.

Adding accounts.
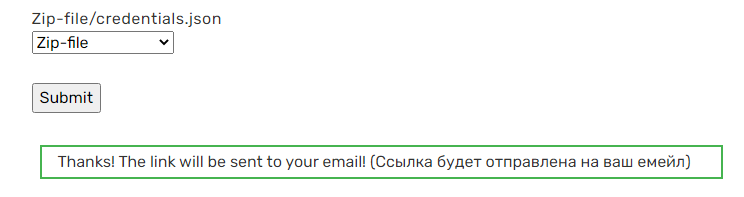
Next go to extension link from email, form extension, select below zip, click Submit and you will receive a new email with the extension archive ready for installation.
After downloading – unpack the archive to a convenient place on your computer. The easiest way is to create a folder called Scenum on the desktop of the computer and extract all the archive files there.. (right click → extract files → Scenum folder). In the future, you will add all accounts using this unpacked extension..
If you use Dolphin Anty or AdsPower, If you use Dolphin Anty or AdsPower. If you use Dolphin Anty or AdsPower.
– Next, open the Google Chrome browser (or multibrowser profile) and go to add extension mode:
– Next, turn on the Developer mode and load the unpacked extension.
– Selecting a Folder (!!!) extensions and click the Select folder button:
– If everything is done correctly, then the Scenum extension will appear in the list of extensions and an icon will appear in the browser menu:
For convenience, you can pin the Scenum icon to the browser bar.
If you did everything in accordance with this instruction, then the connection status will be “enabled” and in your personal account the line given for this connection will be displayed.
This completes the setup and you can add accounts to your personal account.